Steps to Success: Before the Event
STEP 1
Hold an Outreach Planning Meeting.
The Community Coordinator will convene all members of the Community Working Group and the Event Coordinator for the Outreach Planning Meeting. The goals of this meeting are two-fold: identify potential Contributors and assign Community Working Group contacts for all of them, and determine the communications channels and tools that will work best to reach the community.
At the meeting, you will:
- Review the finalized Defining Community Questionnaire provided by the Community Coordinator.
- Create a Contact Spreadsheet listing key individuals and organizations to be contacted and invited to the event from question 8 in the Defining Community Questionnaire. For each contact listed, collect an email address, phone number, social media handle, and/or physical address.
- The RoPA Developers recommend creating a shared Google Sheet to share information in realtime and to allow the whole Community Working Group to access and add to their contact assignments. You can review and adapt this Contact Spreadsheet.
- Assign Community Working Group members or other Project Team members (when appropriate) to contact each individual and organization to tell them about the event, ask them to attend, and help spread the word. Whenever possible, have the Project Team member that supplied their name in the Defining Community Questionnaire be the person to contact them to leverage existing relationships. The goal is to set Project Team members up for success in reaching into the community members and organizations they are connected to. In addition, Community Working Group members can let all contacts know about volunteer opportunities on the event day.
- Identify the communication channels you are going to use. Every community communicates differently--some prefer social media, others prefer newsletters. The important thing is to use communication channels that are already in place and are most often used by the community. Some communication channels to consider are:
- Printed newsletters
- Electronic newsletters
- Newspapers
- In-person meetings (Rotary Club, neighborhood associations, etc.)
- Public programs (library lectures, workshops, etc.)
- Public meetings of elected officials (town meeting, town council meetings)
- Bulletin boards
- Printed materials (flyers, postcards, posters, etc.)
- Cable TV
- Social media (Facebook, Twitter, etc.)
- Email listservs
- Word of mouth
Regardless of which communication channels your Project Team chooses, the RoPA Developers recommend that you create a press release, a flyer, and a place on the internet where information about the event can be found (i.e. library website, Facebook event, etc.) at a minimum.
STEP 2
Create and distribute publicity materials.
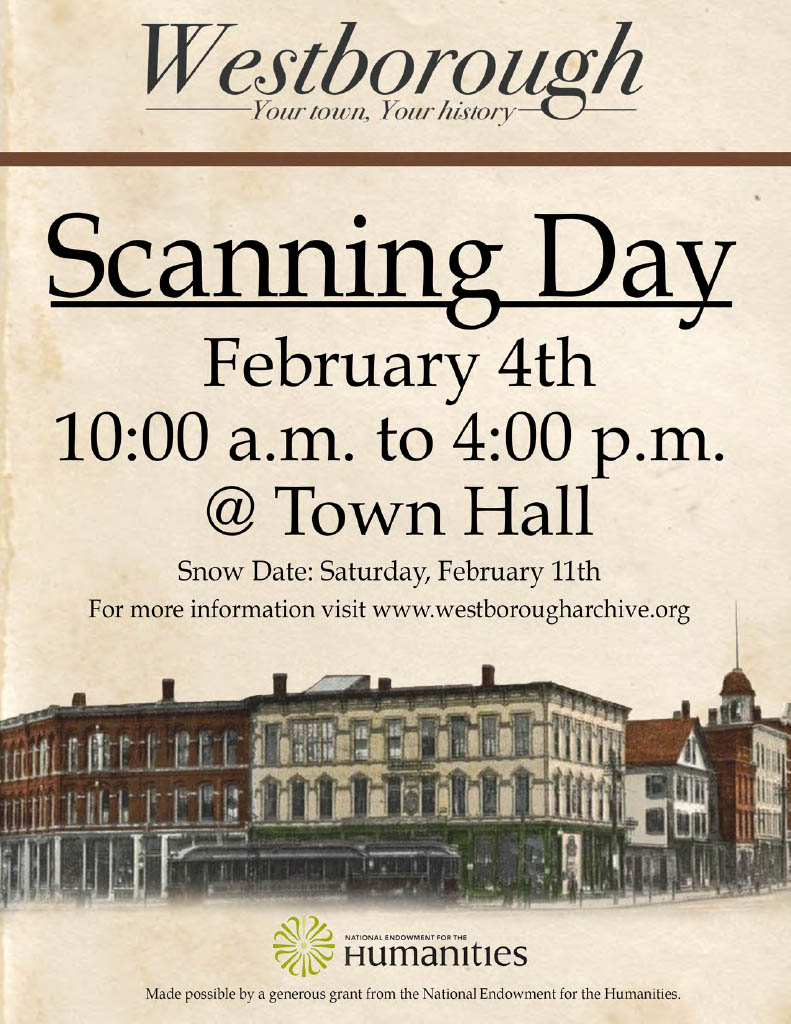
Flyer for a participatory archiving event in Westborough, Massachusetts, 2017
Now that your Project Team has chosen your communication channels, assign Community Group Working members to create and distribute the materials using the guidelines below.
Press Release
A press release is a short, compelling news story providing essential information about your event. It serves as the basic tool for sharing a standard description of the event with targeted members of the media and community organizations. The goal of the press release is to spark the interest of journalists or newsletter editors to write their own stories about the event.
An informative event press release includes:
- the location, date, time of the event;
- the event name and theme;
- a summary of the event goals and purpose;
- the call to action: an invitation to Contributors and how they can participate, i.e. a clear message about what items they should bring to the event;
- the specific example description of a community member and what they plan to bring to the event. It’s helpful to obtain permission from this community member for the media to contact them;
- the plans for creating a digital collection and its repository;
- the project team member organizations;
- the event sponsors; and
- the contact person, phone, and email.
You can download a sample press release here.
One or two months before the event, the Community Coordinator or the designated Outreach Specialist will send the completed press release to:
- Local newspapers;
- Local radio stations;
- Local cable TV stations;
- Organizations with regular (monthly, weekly) newsletters and enewsletters;
- Local online blogs;
- Community calendars; and
- Community listservs.
Flyer
A flyer is a one-page 8 ½ x 11-inch paper sheet with text and images describing the event. It serves as the primary vehicle for communicating the event name and theme. A simple, eye-catching design--ideally printed in color--is an attractive way to inform community members about the event and encourage them to attend and participate.
An effective event flyer includes:
- the location, date, time of the event;
- the event name and theme;
- the call to action: an invitation to Contributors and how they can participate, i.e. a clear message about what items they should bring to the event;
- two-to-three images--examples of what to bring, historical and/or contemporary, depending on event theme or focus;
- where the collection will be available and (if possible) when
- the Project team member organizations;
- the event sponsors;
- the contact person, phone, and email;
- the institutional logos of Project Team partners;
- the names and/or logos of event partners; and
- the names and/or logos of event sponsors.
Be sure to follow the rules required by institutions where you plan to post
One or two months before the event, all Community Working Group members will distribute the flyers by:
- Handing out to assigned contacts and other friends, family members, and colleagues
- Posting in store windows and on community bulletin boards
- Placing piles on library counters, visitor center information desks, etc.
You can download sample flyers here.
Place on the Internet
A participatory archiving event needs a place on the internet where community members can find information about what to expect and how to participate. The Community Working Group and other Project Team members can share a link to this place in emails and social media posts. It’s ideal to offer an option for users to download the event flyer from this digital location.
In choosing an online home for your event, consider the following options:
- a library website;
- a town website;
- a website for one of the partner organizations represented on the Project Team;
- a dedicated website for the participatory archiving event and related projects; or
- a Facebook event. Multiple organizations can be the event hosts. One organization creates the event on its page and then invites other organizations to serve as co-hosts. Use your flyer as the cover photo image on your Facebook event page.
Additional communication tools (optional)
Postcard
Many Project Teams find it useful to produce a smaller version of the flyer in a postcard format. Postcards can be easily distributed from library checkout counters and other venues. Event details can be explained using both sides of the card. In addition, if your community prefers receiving mail, you can also send postcards to existing mailing lists.
An effective flyer includes:
- the location, date, time of the event;
- the event name and theme;
- the Call to action: an invitation to Contributors and how they can participate, i.e. a clear message about what items they should bring to the event;
- two-to-three images--examples of what to bring, historical and/or contemporary, depending on event theme or focus;
- where the collection will be available and (if possible) when
- the Project team member organizations;
- the event sponsors;
- the contact person, phone, and email;
- the institutional logos of Project Team partners;
- the names and/or logos of event partners; and
- the names and/or logos of event sponsors.
Download a sample postcard here.
Cable TV promotional Public Service Announcement (PSA)
Consider contacting your local station to produce a PSA to promote your event. PSAs are a great opportunity to issue a warm, friendly invitation that explains the event, its significance, and how to participate in detail.
Local cable TV stations can be excellent partners for publicity. They are community oriented and often in search of new content of interest to local viewers. Participatory archiving Project Teams find it fruitful to work with these stations as well as high school students and volunteers to produce PSAs for broadcasting on television or distributing through social media.
An effective PSA includes:
- the location, date, time of the event;
- the event name and theme;
- the Call to action: an invitation to Contributors and how they can participate, i.e. a clear message about what items they should bring to the event;
- two-to-three images--examples of what to bring, historical and/or contemporary, depending on event theme or focus;
- one or two specific example descriptions or illustrations from community members and what they plan to bring to the event;
- the Project Team member organizations;
- the event sponsors;
- where the collection will be available and (if possible) when
- the institutional logos of Project Team partners;
- the names and/or logos of event partners;
- the names and/or logos of event sponsors; and
- the place on the internet where you can find more details.
View a sample PSA here.
Letter of Invitation
All Project Team members can tap into their networks to help spread the word about the event. At the Outreach Meeting, everyone was assigned community contacts. To make getting in touch with these contacts as easy as possible, your Project Team may decide to create a letter of invitation that can easily be adapted for each individual Project Team member. These letters can be sent via email or regular mail, depending on the relationship between the Project Team member and the individual or organization.
An effective letter of invitation includes:
- the Location, date, time of the event;
- the Event name and theme;
- a summary of the event goals and purpose;
- the Call to action: an invitation to Contributors and how they can participate, i.e. a clear message about what items they should bring to the event;
- the Specific example description of a community member and what they plan to bring to the event. It’s helpful to obtain permission from this community member for the media to contact them;
- the Plans for creating a digital collection and its repository;
- the Project team member organizations;
- the Event sponsors; and
- the Contact person, phone, and email.
You can view a sample letter of invitation here.
Public Announcements and Presentations
At the Outreach Planning Meeting, some Project Team members were assigned organizations in the Contact Spreadsheet. They will look for opportunities, such as public meetings or programming, to speak to members of these groups. Depending on the context, they may choose to make formal presentations with a slide deck or they may prefer to make an informal announcement at an organizational meeting under “new business” and invite people to speak to them after the meeting. Alternatively, the Community Working Group may decide to host an information session for multiple organizations specifically about the event.
Project Team member organizations can make announcements at their own programming events. Patrons who previously attended library programs, events, and activities are likely to attend participatory archiving events as well. Consider identifying programs related to your event such as genealogy workshops and local history programs where Project Team members can hand out fliers and speak for a few minutes about the project.
STEP 3
Create a social media plan.
The amount of effort you put into your social media plan will be determined by your audience. If your community does not use social media to connect with one another, then you will probably only need one place on the web where the Community Working Group can share information about the event.
At the Outreach Planning Meeting, if your Project Team identified social media platforms already in use by the community then you will need to create a social media plan using these platforms.
The Social Media Specialist will consult with partner organizations about what platforms they have access to and which accounts will be used to promote the event. Some organizations may have dedicated social media staffing who will be available to help. In some instances, they may have ideas about how to customize the information to fit their organization’s specific brand and tone. In this case, the Social Media Specialist will provide those staff members with detailed information about the event and work with them to create content and establish a basic timeline of when posts should be uploaded.
Alternatively, your Project Team may decide to create new, event-specific accounts and profiles to promote the event.
The best posts will include images from personal collections as well as museum and library repositories that can serve as examples of the kinds of items you are encouraging Contributors to bring. Community Working Group members may have materials of their own to share and can build enthusiasm for the event by letting others know they plan to attend and providing a preview of what they plan to bring. Posts can also be used to highlight why it’s important to contribute items to the collection.
A month before the event, be sure to post multiple times a week. Posting frequently keeps your event on the forefront of Contributors’ minds. Don’t forget, you can create content earlier and set up automatic posts.
STEP 4
Consider translating these publicity materials and social media postings into additional languages.
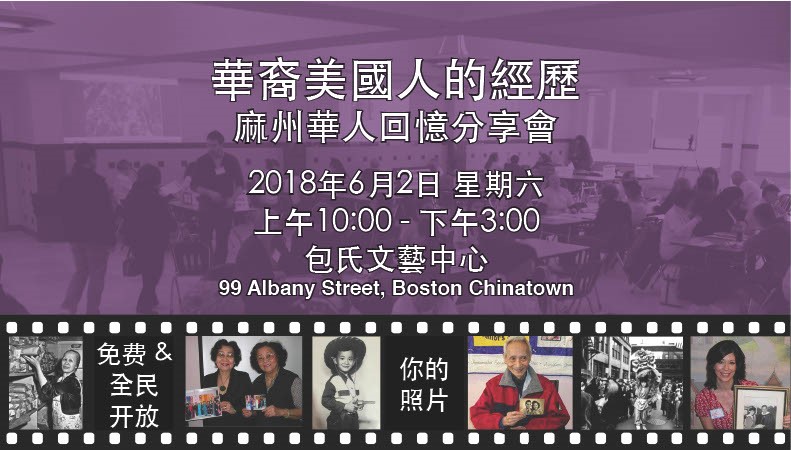
Chinese American Experiences Mass. Memories Road Show flyer translated into Simplified Chinese, 2018
If there are significant numbers of individuals in the defined community who do not speak English, you will need to translate your publicity materials into additional languages to make the information accessible to foreign-language speakers. Identify a Community Working Group member who can translate materials or who can find a community member who is able and willing to assist in this way. High-school and college students can often assist in translation.
If your Project Team plans on translating publicity materials into different languages, remember your event will need to include translators for each language used in advertising.
STEP 5
Spread the word within personal, professional, and community networks.
At the Outreach Planning Meeting, Community Working Group members received assignments on the Contact Spreadsheet. It’s time to pick up the phone, press the send button, and hit the pavement!
Getting people to attend your event requires a conversation. Talk to them! Help them understand the importance of the event and encourage them to think about what they would like to bring. Word-of-mouth is the most effective way to spread the word about participatory archiving events.
About two to three months before your event, each Community Working Group member will use the press release, flyer, internet links, and any other publicity materials your Project Team decided to create to spread the word to their assigned contacts. As the conversations flow, Community Working Group members may learn about additional people to invite; make sure to add these people to the Contact Spreadsheet and assign them to a Community Working Group member. Keep track of the contact information of anyone who says they may be interested in volunteering at the event.
The Community Coordinator will check in with the Community Working Group at least once a month to compare notes on the team’s outreach progress. Use the Contact Spreadsheet to track people who have committed to attend. This can help you gauge attendance.
Two months before the event, the Community Coordinator and the Event Coordinator will compare notes to discuss volunteer recruitment efforts.
To encourage contacts to attend and participate, Community Working Group members will:
- talk to contacts in person about the importance of the event and what to bring;
- call contacts on the phone;
- send emails and letters of invitation;
- share the press release and flyer and ask contacts to share with others;
- ask contacts to post flyers in store windows, bulletin boards, etc.; and
- make public announcements and presentations at contact organizations.
While the Community Working Group makes a focused outreach effort using the Contact Spreadsheet, everyone on the Project Team is responsible for doing what they can to ensure a robust and representative turnout at the event.
STEP 6
Recruit volunteers to attend an Event Orientation and Training Session and work at the event.
The Community Coordinator and Event Coordinator will work in tandem to ensure that there are enough volunteers to staff the event day. For a large event, you will need a total of 20-25 volunteers. For a smaller event, you will need 15-20 volunteers. Depending on the size and duration of your event, you may choose to organize volunteers in half- or full-day shifts.
A month in advance, the Event Coordinator will select a date and time for the Event Orientation and Training Session, and the Community Coordinator will begin to get serious about filling the volunteer roster. A helpful first step is to ask Community Working Group members to volunteer at the event. In addition, the Community Coordinator will review the list of community members on the Contact Spreadsheet who expressed an interest in volunteering. The Community Coordinator will contact these individuals to confirm their availability to attend an Event Orientation and Training Session on a designated date and to work at the event. If there are not enough people, the Community and Event Coordinators will work together to identify additional volunteers.
During the event, volunteers will be assigned to one of three stations: the Welcome Station, the Information Station, or the Copying Station. Should your Project Team decide to host Community Tables, you may also have a volunteer assignment for that station. Don’t worry about assigning volunteers to a specific station--there are a variety of tasks--technical and non-technical, sitting and standing--to accommodate multiple skill sets, interests, and preferences. The assignments will be finalized during the Event Orientation and Training Session after everyone has had a chance to learn about the stations.
Don’t forget to let volunteers know that they can be Contributors, too. Encourage them to bring their own Items to the event to add to the collection; in fact, they’ll need to bring Items so they can practice on site before the event officially opens. There will also be plenty of time during the day for volunteers to share and copy Items.
STEP 7
Make a plan to gather information about event attendees.
When Contributors register at your event, they are required to complete an Event Registration and Permission Form. This form will allow you to track attendance and is an opportunity to discover additional information about Contributors.
The standard Event Registration and Permission Form asks Contributors about their connection to the community and how they heard about the event. Think about what else you may want to learn about Contributors. If there are additional questions you’d like to ask, or if you’d like to modify these standard questions, the Community Coordinator will work with the Collection Coordinator to revise the form.