Steps to Success: Before the Event
STEP 1
Designate a Digital Preservation Specialist.
The Collection Coordinator will designate a member of the Project Team to serve as the Digital Preservation Specialist. The Digital Preservation Specialist will develop a digital preservation plan for the collection, prepare hard drives, and backup files. They will also carry out all activities related to ensuring stable, long-term access to the digital files and metadata. The RoPA Developers recommend that the Digital Preservation Specialist be a staff member of the Collecting Organization who is detail-oriented and comfortable with technology.
STEP 2
Select your Digital Preservation Storage Platforms.
Preserving digital items and files is different in a number of important ways from preserving physical items, such as paper collections or photographic prints. Effective digital preservation requires a certain amount of data redundancy. One helpful acronym for thinking about the efficacy of data redundancy is the concept of “LOCKSS,” which stands for “lots of copies keep stuff safe.” See the glossary for a fuller explanation of data redundancy.
Following digital preservation best practices will help ensure that your collection is safe, and is available to researchers and community members over the long term.
There are two major parts to effective digital preservation:
- Storage: Digital preservation best practice has us aim for preserving digital content in at least three different places, though for many this can feel like a daunting undertaking at first. For this reason, the RoPA Developers recommend storing your collection, and information about your collection, on a minimum of two Digital Preservation Storage Platforms.
- Digital Stewardship: Simply storing files and data in a secure place isn’t enough to ensure they will be accessible over the long term, so we also recommend developing a schedule for performing digital preservation activities on the files and data you’re storing. Doing this also involves determining who will be responsible for performing these activities. This process ad these activities broadly encompass digital stewardship, and we will provide recommendations and workflows for performing this work in the After the Event section of this module.
Preparing to carry out effective digital preservation on your collection will require a certain amount of research and implementation time, so it’s important that you begin this work early in the participatory archiving process. Your Project Team will need to have a plan in place before you host your event. Depending on the resources of the Collecting Organization that will be overseeing this work on behalf of the Project Team, the RoPA Developers recommend choosing at least two of the following six Digital Preservation Storage Platform options.
Option 1: Use your existing Digital Preservation Storage Platforms(s) or program.
If your Collecting Organization already has a digital preservation program that employs the use of two-three Digital Preservation Storage Platforms, consider simply adding this new collection to the existing digital preservation workflows. This should be relatively straightforward as you would be following established protocols and have staff support to carry out the preservation and digital stewardship activities. If you choose this path, the Digital Preservation Specialist will work with the Collecting Organization staff members to ensure that the digital preservation requirements outlined in RoPA align with the existing digital preservation program and platforms.
Option 2: Use your new online digital repository platform.
In the process of selecting an online digital repository (in the Putting the Collection Online module) the Project Team will have the option to employ the use of an online digital repository that has digital preservation capabilities built in.
The RoPA Developers do not endorse any one platform; we want to help you make informed decisions about which platforms are best suited for your budget and needs. The RoPA Vendor and Repositories Spreadsheet (download as MS Excel file) currently includes a breakdown of several repository platforms, and we expect this list to grow. The list addresses a number of factors to consider when choosing one or more repository platforms to manage, store, and provide access to your digital collection, including:
- Hosting and implementation requirements;
- Whether a repository platform can serve as a public-facing front-end;
- Whether a repository platform can serve as a Digital Preservation Storage Platform; and
- Cost concerns.
Please contact us if there is a repository platform or system that you recommend the RoPA Developers include.
Your Project Team may have decided to host their own online digital repository. If this is the case, you will need to determine whether you can incorporate digital preservation storage and stewardship activities into the platform. It may not be possible for your online digital repository to serve in this capacity, so your Project Team will need to choose two other options.
Option 3: Use your own institutional servers.
Many institutions have an IT (Information Technology) department that hosts institutional servers for sharing and storing files. These servers, in turn, may also have data redundancy built in to help ensure some level of protection of files from accidental deletion or editing. If your Collecting Organization has such a department, consult with them to see if you might be able to use these servers as one of your Digital Preservation Storage Platforms.
If this is an option, you will also need to be sure to develop a digital stewardship plan related to the IT servers that includes regular reviews of content and files to make sure there is no file degradation. This is covered in more detail in the After the Event section of this module.
Option 4: Use the Digital Preservation Hard Drive.
You will be setting up and putting all your files on a Digital Preservation Hard Drive as part of this module (see Step 3 below). You could decide to have this device serve as one of your Digital Preservation Storage Platforms. If so, it’s important to store the drive in a secure place, ideally an area with limited access and with some kind of climate and temperature controls. It’s also important that this drive not be used for other storage or transfer activities, as these might introduce viruses and pose other risks to the contents of the drive.
In addition, you will need to develop a digital stewardship plan related to the Digital Preservation Hard Drive that includes regular reviews of hard drive content to make sure there is no file degradation. This is covered in more detail in the After the Event section of this module.
Since you are already using this device to prepare your event files for preservation, the RoPA Developers recommend using the Digital Preservation Hard Drive as one of your two-three preservation storage options.
Option 5: Use a vendor-supported Digital Preservation Storage Platform.
If your Collecting Organization doesn't have the in-house expertise to host and maintain your own Digital Preservation Storage Platform, you may want to explore using a vendor-supported platform and/or system. While there may be more upfront and maintenance costs, the vendor will be available to address any errors, glitches, or larger-scale platform problems that arise over time.
Archivally sound digital preservation storage requires more than just uploading files somewhere and forgetting about them. Many vendor-supported Digital Preservation Storage Platforms have digital preservation stewardship activities, such as data redundancies and data integrity checks built into them.
The RoPA Developers do not endorse any one platform; we want to help you make informed decisions about which platforms are best suited for your budget and needs. The RoPA Vendor and Repositories Spreadsheet (download as MS Excel file) currently includes a breakdown of several repository platforms, and we expect this list to grow. The list addresses a number of factors to consider when choosing one or more repository platforms to manage, store, and provide access to your digital collection, including:
- Hosting and implementation requirements;
- Whether a repository platform can serve as a public-facing front-end;
- Whether a repository platform can serve as a Digital Preservation Storage Platform; and
- Cost concerns.
Please contact us if there is a repository platform or system that you recommend the RoPA Developers include.
Option 6: Use a local, statewide, or regional storage platform if one is available to you.
If your Project Team does not yet include a Collecting Organization or if you don’t have the in-house technical experience to carry out some of the digital preservation activities on your own, you may be able to partner with a local institution or regional organization to assist with digital preservation storage.
As with your planning around putting the collection online, your Project Team will know your cultural landscape best. If you’d like to explore partnering with a local institution, consider contacting:
- Local colleges and universities;
- Local museums;
- Historical societies or other cultural institutions; or
- Regional or statewide library networks.
If you’d like to partner with a regional organization, the RoPA Developers compiled a list of regional and statewide repositories (download as MS Excel file), many of which are connected to the Digital Public Library of America (DPLA) and some of which may be able to assist with digital preservation activities and storage. The RoPA Developers expect to update this list on an annual basis.
Please contact us if there are updates, additions, or errors that we should address.
STEP 3
Prepare two portable USB external hard drives for use during the event and preservation.
The Digital Preservation Specialist will work with the Event Coordinator to identify, purchase, and label two portable USB external hard drives. View the RoPA Equipment and Software Inventory list (download as MS Excel file) for recommendations about which hard drives to purchase and use.
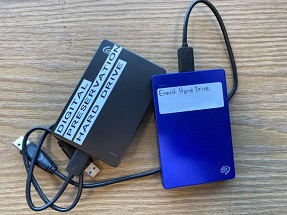
Set up the Event Hard Drive.
The Digital Preservation Specialist will use the Event Hard Drive on the day of the event to back up collected digital files from each Copying Station computer. This drive will also be used after the event to share copies of collected digital files with the Online Access Specialist and the Data Entry Volunteer.
The Digital Preservation Specialist will prepare the Event Hard Drive by creating a folder structure that includes folders for each Copying Station, for digitized event paperwork, and for Items that are emailed during the event. The Event Hard Drive should also be clearly labeled so it can be distinguished from other hard drives.
The RoPA Developers recommend using the following folder structure, which you can download as a zipped file here.
Event Hard Drive
- event#-YYYYMMDD-event-name
- preservation-copies-f0
- all-items
- Copying Backup1 Mid-Day
- Copying Station 1
- Copying Station 2
- Copying Station 3
- Copying Backup2 End-of-Day
- Copying Station 1
- Copying Station 2
- Copying Station 3
- Descriptive Information Forms
- Emailed Items
- Event Registration and Permission Forms
- preservation-copies-f0
To copy this folder structure to your Event Hard Drive, simply download the zipped file and right-click or double-click on the zipped folder to view the folder structure. Copy and paste the folder structure onto the Event Hard Drive and change the folder titled “event#-YYYYMMDD-event-name” to match your event number, the name of your participatory archiving event, and the year, month, and date of the event in place of YYYYMMDD. For example, if this was your sixth event and if your event name was “Bartlesville Community Stories” and was held on May 4, 2018, the folder name would be “event6-20180504-bartlesville-community-stories”.
Set up the Digital Preservation Hard Drive.
The Digital Preservation Hard Drive will serve as a place where the Digital Preservation Specialist can back up both preservation and production copies of files.
The Digital Preservation Hard Drive may also serve as one of your two Digital Preservation Storage Platforms, if you so choose. The RoPA Developers recommend using this as one of your preservation storage options (see Step 2 of this module).
The Digital Preservation Specialist will prepare the Digital Preservation Hard Drive by creating a folder structure that will help facilitate digital preservation efforts after the event. The Digital Preservation Hard Drive should also be clearly labeled so it can be distinguished from other hard drives.
The RoPA Developers recommend the following folder structure for the Digital Preservation Hard Drive, which you can download as a zipped file here.
Digital Preservation Hard Drive
- event#-YYYYMMDD-event-name
- items
- metadata
To copy this folder structure to your own Digital Preservation Hard Drive, simply download the zipped file and right-click or double-click on the zipped folder to view the folder structure. Copy and paste the folder structure onto the Digital Preservation Hard Drive and and change the folder titled “event#-YYYYMMDD-event-name” to match your event number, the name of your participatory archiving event, and the year, month, and date of the event in place of YYYYMMDD. For example, if this was your sixth event and if your event name was “Bartlesville Community Stories” and was held on May 4, 2018, the folder name would be “event6-20180504-bartlesville-community-stories”.
About the RoPA Folder Structure
The RoPA Folder Structure may look a little odd at first, with some folder titles being in lower case, while other folder titles are capitalized. This is by design to help streamline both the Item collection process and the post-event processing work carried out by the Online Access Specialist and the Digital Preservation Specialist.
One example of how the RoPA Folder Structure operates related to why there is an “f0” and an “f1” at the end of the preservation-copies-f0 folder name and the production-copies-f1 folder name. After the Digital Preservation Specialist completes all digital preservation processing activities after the event, there will ultimately be two folders (with subfolders):
- The preservation-copies-f0 folder will contain all of the original, unedited Items that were copied at your event.
- The production-copies-f1 folder will include edited and normalized versions of all of the files that were copied at your event.
For the purpose of differentiating between these two different versions of the files, “f0” simply means “unedited, preservation copy” and “f1” means “edited, production and access copy.”
STEP 4
Create an Event Email Address for digital contributions at the Copying Stations.
The Digital Preservation Specialist will create or designate an Event Email Address to be used by Contributors who have Items they’re donating that are on their smartphone or smart device. This Event Email Address should be shared with the Collection Coordinator, who will add it to the Workflow for Emailing Items (in Step 5 of the Before the Event section of the Copying Items module). The RoPA Developers recommend setting up an easy to read and understand Event Email Address.
STEP 5
Download and install digital preservation software and tools.
There are a number of free tools available to assist you in your digital processing and preservation activities after the event. The five tools that the RoPA Developers recommend downloading and installing before the vent on the computer you will be using to perform your digital preservation activities are:
Adobe Acrobat Pro DC, or other PDF viewing and editing software
It's important that you not only are able to view PDF files, but that you are also able to edit and reformat them. For this reason, we recommend purchasing a subscription (for one month, or longer) to Adobe Acrobat Pro DC, or other similar PDF viewing and editing software.
- Adobe Acrobat Pro DC is available for a monthly or annual fee.
- View Adobe products: www.adobe.com/acrobat/complete-pdf-solution.html
Antivirus software
Most Collecting Organizations will already have some form of antivirus software installed on their computers. In fact, machines running Windows 10 or higher have a built-in antivirus software installed called Microsoft Defender. Whatever antivirus software you use will probably be sufficient. If you need to choose and install antivirus software, Harvard University’s Information Security office has a site that provides some recommendations for effective and free software, as well as more highly-rated recommendations for Windows and Mac provided by AV-Test, an independent organization that tests and provides recommendations on a variety of antivirus and security software.
HashMyFiles
This free tool generates a checksum for each file you have, with the aim of identifying duplicate files. See the glossary for an introduction to the importance of generating accurate checksums for the digital files in your collection.
- HashMyFiles is only compatible with Microsoft Windows, not Mac.
- Download HashMyFiles for free here: www.nirsoft.net/utils/hash_my_files.html
- Note: You will need to scroll down the page quite a bit to find the download button. You will also see three different options for the download, one for “HashMyFiles,” one for “HashMyFiles for 64-bit systems” and one for “HashMyFiles - Non-Unicode Version (For Windows 98.” You can disregard the third option, as it’s very unlikely that you are running a PC using Windows 98. To determine whether you need to download the “HashMyFiles for 64-bit systems” version, view this tutorial from Microsoft.
- Ignore the Ads: On the HashMyFiles site, ignore the various DOWNLOAD images and buttons and look specifically for the three download options embedded on the page. The other DOWNLOAD buttons are ads.
IrfanView
This free tool is useful for a wide range of scanning and image processing needs.
- IrfanView is only compatible with Microsoft Windows, not Mac.
- Download IrfanView for free here: www.irfanview.com/main_download_engl.htm
MD5Summer
This free tool generates and verifies checksums, which is a way of differentiating between different individual files and groups of files, and of verifying if these files change or are damaged, either due to an action you take or gradually over time. There are other checksum generating and verifying tools. MD5Summer is just one option.
- MD5Summer is only compatible with Microsoft Windows, not Mac.
- Download MD5Summer for free here: www.md5summer.org/
TeraCopy
This free tool allows you to copy or move digital files, while retaining the original creation dates. The tool also uses cyclic redundancy check (CRC) checksums, which means that TeraCopy confirms that no errors occurred during the file copying process.
- There are versions of TeraCopy for both Microsoft Windows and Mac.
- Download TeraCopy for free here: codesector.com/teracopy
- After installing TeraCopy, open the software and go to the Preferences section to change the settings for the tool. Depending on you version of TeraCopy, you can access the Preferences section by clicking on the circle/gear wheel in the copy bar of the application screen.
- Make sure your settings look similar to those in this image, so that your use of TeraCopy will align with the workflows in later sections of this module. These settings are from version 3.8.5 of TeraCopy.
The RoPA Developers strongly recommend becoming familiar with these tools and installing them on the computer in advance of the event, particularly TeraCopy, which will be used to copy digital files to the Event Hard Drive.